This post may contain affiliate links. Please see my disclosure policy for more information.
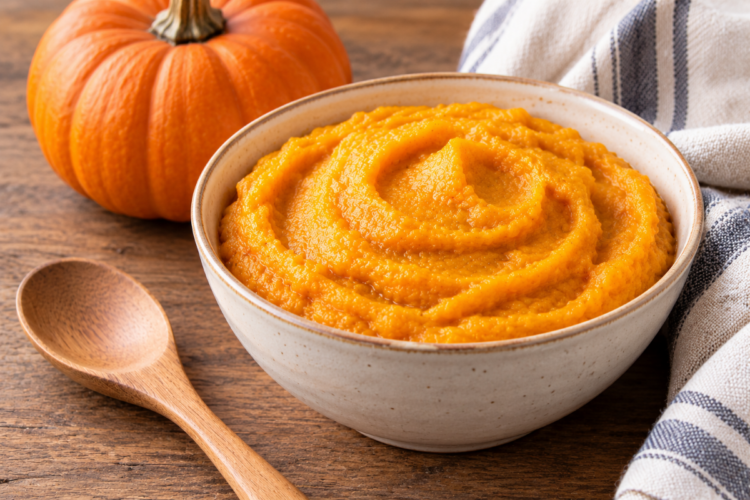
Homemade Pumpkin Puree
Did you know you can make your own pumpkin puree at home with just one ingredient? Homemade pumpkin puree is easy to make, tastes fresh, and is a great way to use those small pumpkins you see at the grocery store and farmers’ market every fall.
All you need is a small sugar pumpkin, an oven, and a blender or food processor. Roasting the pumpkin softens the flesh and makes it easy to blend into a smooth puree that you can use in pumpkin bread, muffins, pies, soups, and many other recipes.
Making your own pumpkin puree can also save money when pumpkins are in season. If you enjoy baking with pumpkin throughout the fall, you can make a batch now and freeze portions to use later. Once you see how easy it is, you may never look at those little pie pumpkins the same way again!
What Is Pumpkin Puree?
Pumpkin puree is simply cooked pumpkin that has been blended until smooth. It contains no added sugar, spices, or other ingredients, making it a versatile ingredient for both sweet and savory recipes.
You can purchase canned pumpkin puree at the grocery store, but homemade pumpkin puree is easy to prepare in your own kitchen. Roasting the pumpkin brings out its natural flavor and produces soft flesh that blends into a creamy consistency.
Homemade pumpkin puree can sometimes contain more moisture than canned pumpkin, so you may need to drain it before using it in certain recipes, especially baked goods.
Ingredients Needed
You only need one ingredient to make homemade pumpkin puree!
1 small sugar or pie pumpkin: Choose a pumpkin weighing approximately 2 to 4 pounds. Sugar pumpkins, also called pie pumpkins, have sweet, tender flesh that works well for cooking and baking.
You will also need a baking sheet lined with parchment paper or foil and a food processor, blender, or immersion blender to puree the cooked pumpkin.
Important: Avoid using the large pumpkins typically sold for carving jack-o’-lanterns. They tend to have stringier, more watery flesh and are not the best choice for baking. However, they can be used for soups and sauces.
How to Make Homemade Pumpkin Puree
Step 1: Preheat the oven
Preheat your oven to 400°F. Line a baking sheet with parchment paper, Silpat mat, or foil to make cleanup easier.
Step 2: Prepare the pumpkin
Wash the outside of the pumpkin to remove any dirt. Carefully cut off the stem, then slice the pumpkin in half lengthwise.
Small pumpkins can be firm, so use a sturdy knife and a stable cutting board. Take your time while cutting to avoid slipping.
Step 3: Remove the seeds
Use a large spoon to scoop out the seeds and stringy pulp from both pumpkin halves. Scrape the inside until most of the loose fibers are removed.
Don’t throw away the seeds if you enjoy roasted pumpkin seeds! You can clean them, season them, and roast them separately for a crunchy snack.
Step 4: Roast the pumpkin
Place the pumpkin halves cut-side down on the prepared baking sheet. Roast for 30 to 45 minutes, depending on the size and thickness of the pumpkin.
The pumpkin is ready when the flesh is very tender, and a fork easily pierces it. Larger or thicker pumpkins may need a little extra time in the oven.
Roasting helps soften the flesh so it can be scooped out and blended easily.
Step 5: Cool and remove the skin
Remove the baking sheet from the oven and let the pumpkin cool for 10 to 15 minutes, or until it is comfortable enough to handle.
Scoop the soft pumpkin flesh away from the skin with a spoon. The flesh should separate easily once it is fully cooked.
Discard the skin or compost it if you compost food scraps.
Step 6: Blend until smooth
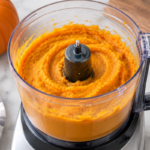
Transfer the cooked pumpkin flesh to a food processor or blender. Blend until the pumpkin becomes smooth and creamy. You can also use an immersion blender in a suitable container.
If the pumpkin is too thick to blend, add a tiny splash of water to help it move. Add as little as possible, since excess moisture may affect the texture of recipes made with the puree.
Continue blending until there are no noticeable lumps.
Step 7: Drain excess moisture if needed
Homemade pumpkin puree can be wetter than canned pumpkin. If yours looks particularly watery, transfer it to a fine-mesh sieve lined with cheesecloth and let it drain for about an hour. You can also gently squeeze out excess moisture using cheesecloth.
This step is optional, but it can make a difference when using homemade puree in pumpkin pie, muffins, bread, and other baked goods.
Your homemade pumpkin puree is now ready to use!
Tips for Making the Best Pumpkin Puree
Choose the right pumpkin. Sugar pumpkins and pie pumpkins are best for homemade puree because they have tender flesh and a pleasant flavor.
Roast until completely tender. Undercooked pumpkin can be difficult to blend smoothly. If a fork doesn’t slide easily into the flesh, return it to the oven for a little longer.
Don’t add too much water. Pumpkin naturally contains moisture, and adding extra water can make the puree thinner than you want. Only add a splash if necessary to help your blender or food processor work.
Drain it when needed. If you’re using homemade puree in a recipe that calls for canned pumpkin, compare the consistency before measuring. Draining excess liquid can help produce more consistent baking results.
Make extra while pumpkins are in season. If you find a good price on sugar pumpkins, prepare several batches and freeze the puree in convenient portions.
How to Use Homemade Pumpkin Puree
Homemade pumpkin puree can be used in many of the same recipes as canned pumpkin. Since it contains no added sugar or seasonings, you can use it in sweet and savory dishes.
Here are a few ways to put it to use:
- Pumpkin Cookies: Make easy homemade pumpkin cookies with pumpkin puree, cinnamon, and nutmeg.
- Pumpkin pie: Use it as the pumpkin base for your favorite pumpkin pie recipe.
- Pumpkin bread and muffins: Add pumpkin puree to baked goods for moisture and pumpkin flavor.
- Pumpkin pancakes: Stir it into pancake batter with cinnamon and other favorite spices.
- Pumpkin soup: Use it to make a creamy, savory pumpkin soup.
- Smoothies: Blend a spoonful into a smoothie with banana, yogurt, and cinnamon.
- Oatmeal: Stir pumpkin puree into warm oatmeal with cinnamon and a little maple syrup.
- Pasta sauces: Add it to a creamy pasta sauce for a seasonal twist.
Remember that homemade puree can vary in moisture content, so draining it may be helpful when a recipe depends on the thicker consistency of canned pumpkin.
How to Store Homemade Pumpkin Puree
Once you’ve made your pumpkin puree, proper storage will help keep it fresh until you’re ready to use it.
Refrigerator: Place the cooled puree in a clean, airtight container and refrigerate it promptly. Use it within 3 to 4 days.
Freezer: Freezing is a great option if you make a large batch. Divide the puree into freezer-safe containers or bags, leaving a little room for expansion. You can also freeze it in measured portions so it’s easy to grab exactly what a recipe calls for.
For the best quality, use frozen pumpkin puree within about 3 to 6 months. Thaw it in the refrigerator and drain any excess liquid before using it if necessary.
For convenience, freeze portions in one-cup or two-cup amounts. Label each container with the quantity and date so you know what you have available.
Frequently Asked Questions
What kind of pumpkin is best for homemade pumpkin puree?
Sugar pumpkins and pie pumpkins are the best choices. They are smaller than carving pumpkins and generally have sweeter, more tender flesh that works well in cooking and baking.
Is homemade pumpkin puree the same as canned pumpkin?
Both are cooked pumpkin blended into a puree, but their moisture content can differ. Homemade pumpkin puree may be thinner than canned pumpkin, depending on the variety of pumpkin and how it was cooked. Draining excess liquid can help you achieve a similar consistency.
Can I use homemade pumpkin puree in place of canned pumpkin?
Yes! Homemade pumpkin puree can be substituted for canned pumpkin in most recipes. Use the same measured amount, but check the consistency first. If the homemade version is watery, drain it before adding it to your recipe.
Do I need to peel the pumpkin before roasting it?
No. Roasting the pumpkin halves with the skin on makes preparation easier. Once the flesh is tender and the pumpkin has cooled slightly, you can scoop the cooked flesh away from the skin.
Why is my homemade pumpkin puree watery?
Pumpkin naturally contains water, and some varieties have more moisture than others. Roasting helps soften the flesh, but the finished puree may still be thinner than canned pumpkin. Let it drain in a fine-mesh sieve or cheesecloth until it reaches your desired consistency.
Can I make pumpkin puree without a food processor?
Yes! A blender or immersion blender works well, too. If you don’t have any of these appliances, you can mash the thoroughly cooked pumpkin by hand, although the puree may not be quite as smooth.
Can I freeze homemade pumpkin puree?
Absolutely. Freeze it in airtight, freezer-safe containers or bags in recipe-sized portions. Thaw it in the refrigerator before using, and drain any excess liquid if needed.
Can I use carving pumpkins to make pumpkin puree?
You can, but the results may not be as good. Carving pumpkins often have less flavorful, stringier flesh and a higher water content. For the best results, choose a sugar pumpkin or pie pumpkin.
Homemade Pumpkin Puree Recipe
Homemade pumpkin puree is an easy kitchen staple to make during pumpkin season. With one small pumpkin and a little time in the oven, you can prepare a fresh ingredient for your favorite fall recipes.
Whether you’re planning to bake pumpkin bread, make a batch of pumpkin muffins, or prepare a cozy pot of pumpkin soup, keeping homemade puree in your refrigerator or freezer makes it easy to enjoy pumpkin whenever you like. It’s simple, versatile, and a great way to make the most of fresh pumpkins!
Homemade Pumpkin Puree
Ingredients
- 1 small sugar or pie pumpkin (about 2 to 4 pounds)
Instructions
- Preheat your oven to 400°F
- Wash the pumpkin, cut it in half lengthwise, and remove the stem
- Scrape out all the seeds and pulp
- Place the pumpkin halves, cut-side down, on the prepared baking sheet. Bake for 30 to 45 minutes, or until the flesh is completely tender and easily pierced with a fork.
- Let the pumpkin cool for 10 to 15 minutes, or until it is comfortable enough to handle. Scoop the soft pumpkin flesh away from the skin with a spoon. The flesh should separate easily once it is fully cooked.
- Using a food processor or blender, blend until the pumpkin becomes smooth and creamy.
- If the puree is watery, drain off any excess liquid.
Nutrition

- POWERFUL PERFORMANCE: The 1000-peak-watt motor precisely powers through tough ingredients to ensure smooth, consistent results every time.
- AUTO-IQ TECHNOLOGY: Four intelligent Auto-iQ preset programs take the guesswork out of food prep, providing one-touch control for chopping, slicing, shredding, pureeing, and dough making.
- LARGE CAPACITY: The 9-cup bowl with large feed chute is perfect for large batches, family meals, entertaining, or weekly meal prep, saving you time and effort.
- PRECISION CHOPPING BLADES: Stainless steel Ninja Blades are designed for optimal food processing, perfectly precise chopping, even slicing and shredding, and smooth pureeing.
- SLICING/SHREDDING DISC: This ultra-versatile reversible disc can slice cucumbers, meats and more on one side and shred cheese, carrots, and more on the other side.


- Built-in bowl scraper saves time. Quickly process ingredients without stopping to use a spatula. Simply move the scraper from side-to-side to scrape the bowl while the food processor is running or the power is off — no need to remove the lid.
- Slice, shred, chop, mix and puree with 2 versatile attachments. The Hamilton Beach food processor gives you 5 processing functions and includes a stainless steel slicing/shredding disc and chopping/pureeing blade so you can tackle every job with ease.
- Powerful 450 watt motor. Make healthy salads, homemade salsa, hearty acai bowls and more. The 450 watt motor easily powers through the toughest ingredients, so you can spend less time processing and more time enjoying.
- Precise control with 2 speeds plus pulse. The low and high speeds plus pulse give you the control you need for a variety of recipes. Use the high speed when you need more power and select the low speed for processing or mixing delicate foods.
- 10 cup bowl capacity. The generous 10 cup bowl fits large volumes of food all at once, and the large feed chute saves you time by reducing the need to pre-cut food before processing or using as a vegetable chopper.

- Best German Silicone: We attach great importance to the health of our customers. Therefore, we use the best German WACKER silicone as the raw material in the industry. Food Grade, BPA Free, PFOA Free, Non-toxic. NOT made in Germany.
- Non-Stick Mat: Our baking mats feature a nonstick surface that allows for effortless food removal. No need for oil, cooking sprays, or parchment paper. The thickness of the mat is 0.75MM, which is much thicker than most other mats.
- Easy To Clean: It is super easy to clean even if grease or dough sticks to the surface, just with a cloth or place in the dishwasher.
- Heat resistant up to 500°F degrees (260℃). Safe in the oven or freezer. Size: 11.6x16.5 inches (LxW), 11-5/8" x 16-1/2", fits half-sheet size pans.
- Versatile: Perfect for baking, making pizza/macaron/pies/candy/pastry/cookie/bread/turkey. This high-quality baking mat is also perfect for various holiday gifts.

- SHIPMENT CONTAINS: 2-pack of food-safe silicone baking mats for easy and convenient baking, roasting, or food prep
- REUSABLE & NON-STICK: Flexible silicone releases food without the need for oil, cooking sprays, or parchment paper; can be reused again and again
- OVEN & DISHWASHER SAFE: Heat resistant up to 480 degrees F; use with a baking tray for support; do not put silicone baking mat directly on oven rack; dishwasher safe for easy cleaning
- PRODUCT DIMENSIONS: Each mat measures 16.5 x 11.6 inches (LxW)
- VERSATILE USES: Ideal for baking, roasting, and various food prep tasks