This post may contain affiliate links. Please see my disclosure policy for more information.
How to Make Homemade Fruit Liqueurs
Making homemade fruit liqueur is an easy way to turn fresh or frozen fruit into a flavorful homemade drink. With just a few simple ingredients, you can make different fruit flavors and even bottle them up to give as homemade gifts for Christmas, birthdays, hostess gifts, or other special occasions.
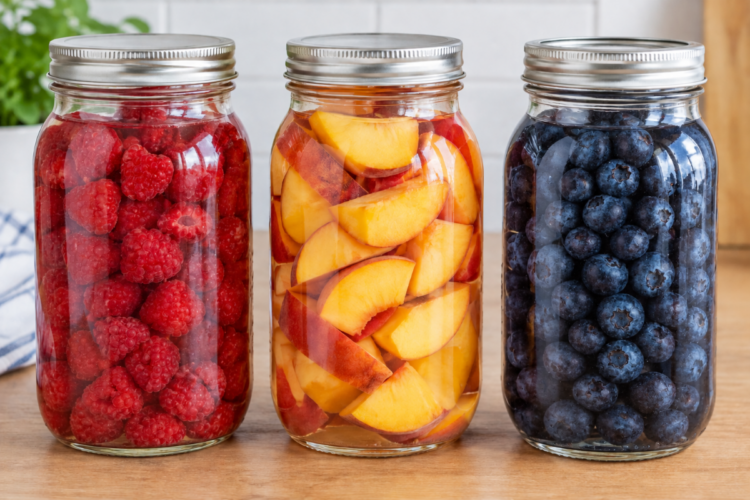
This recipe is also very flexible. You can use berries, peaches, plums, apples, pears, apricots, cherries, melons, or other fruits you have available. You can even use frozen fruit, making this a great recipe to keep in mind when you have fruit stored in the freezer.
The process is simple, but it does take a little patience. Most fruit liqueurs are ready in about 2 to 4 weeks, depending on the type of fruit you use.
What You Need to Make Homemade Fruit Liqueur
You only need a few ingredients to make homemade fruit liqueur.
You’ll need a Quart-size jar for each flavor you want to make. Then you’ll need about 2 ½ – 4 cups of fruit, or enough to fill the jar to just below the neck.
You’ll also need 1 cup of granulated sugar for each jar and vodka or another alcohol of your choice. You don’t necessarily need an expensive alcohol for this recipe since the fruit and sugar will provide much of the flavor. If the fruit you are using is especially sweet, you can reduce the amount of sugar.
What Fruit Can You Use?
There are lots of possibilities when it comes to making homemade fruit liqueur. Soft fruits and berries work particularly well, while harder fruits can take a little longer to release their flavor.
Some fruits you can try include:
- Raspberries
- Strawberries
- Blackberries
- Blueberries
- Peaches
- Plums
- Cherries
- Apricots
- Apples
- Pears
- Watermelon
You can make each jar a different flavor, which is especially fun if you’re making several bottles for gifts.
For fruits with pits, prepare the fruit by cutting them in half and removing the pits, or prick the skins deeply with a clean fork if leaving them whole. You want the fruit to have plenty of surface area for the alcohol to extract the flavor.
Alcohols You Can Use for Homemade Fruit Liqueur
Vodka – The most versatile option. Because vodka has a relatively neutral flavor, it works well with almost any fruit, especially berries, peaches, cherries, and other delicate fruits.
Brandy – A natural choice for fruit-based liqueurs and particularly good with peaches, apricots, cherries, plums, and pears. It adds its own fruity, slightly sweet character.
Rum – White rum is a good option when you want the fruit flavor to remain prominent. Dark or aged rum will add a richer, warmer flavor that can work especially well with peaches, cherries, apples, and tropical fruits.
Bourbon – Bourbon gives fruit liqueur a deeper, more robust flavor with notes of vanilla, caramel, and oak. It pairs particularly well with peaches, cherries, apples, and pears.
Whiskey – Different types of whiskey can give the finished liqueur a stronger, more complex flavor. Try it with cherries, apples, pears, or other fruits that can stand up to a bolder spirit.
Tequila – Blanco tequila can be an interesting choice for fruit infusions, especially with berries, peaches, pineapple, mango, and citrus. It will give the finished liqueur a distinct tequila flavor.
Gin – Gin can be used for fruit infusions, although its botanical flavor will be noticeable. Berries, peaches, pears, and citrus can pair nicely with gin.
Which Alcohol Is Best?
If you’re making homemade fruit liqueur for the first time, vodka is probably the best place to start. Its mild flavor allows you to really taste the fruit without competing with it.
For a more traditional fruit brandy flavor, choose brandy. If you’d like something richer and more distinctive, bourbon, whiskey, or aged rum can create some interesting combinations.
How to Make Homemade Fruit Liqueur
Start by sterilizing your jars. Allow them to cool completely before adding your fruit.
Fill the jar with your fruit of choice, stopping just below the neck of the jar. For fruits with pits, prepare the fruit by cutting them in half and removing the pits, or prick the skins deeply with a clean fork if leaving them whole. For a quart-size jar, this will generally be about 2 ½ -4 cups of fruit, although the exact amount will depend on the type and size of the fruit you’re using.
Add 1 cup of granulated sugar to the jar.
Next, pour in your vodka or other alcohol of choice. Leave about ½ inch of space at the top of the jar rather than completely filling it.
Put the lid on the jar and make sure it is sealed tightly. Add a strip of tape to the jar and write the date on it. This makes it easy to remember when you started your batch.
Give the closed jar a gentle shake to help distribute the sugar, fruit, and alcohol. Then place it in a cool, dry area away from direct sunlight.
You don’t need to do anything complicated while the fruit is infusing. Give the jar a gentle shake every couple of days to help keep everything mixed together.
How Long Does Homemade Fruit Liqueur Take?
Most homemade fruit liqueurs are ready in about 2 to 4 weeks.
The exact timing depends on the fruit you’re using.
Soft fruits and berries generally take about 2 weeks. Raspberries, strawberries, blackberries, and other soft fruits tend to release their color and flavor fairly quickly.
Harder fruits and fruits with pits generally take about 3 to 4 weeks. Peaches, plums, cherries, apples, pears, and other firmer fruits need a little more time for the alcohol to extract their flavor.
You don’t need to leave fresh fruit in the alcohol for months. Once the liqueur has developed the flavor you want, it is time to strain out the fruit.
How to Strain Homemade Fruit Liqueur
Once your fruit has finished infusing, remove it from the liqueur.
Start by pouring the mixture through a colander to catch the larger pieces of fruit.
For a clearer finished liqueur, strain it again through a fine-mesh sieve. You can also line a colander or sieve with cheesecloth or muslin cloth. A coffee filter can also be used if you want to filter out even smaller pieces and sediment.
The second straining step takes a little longer, but it can give you a much clearer finished product.
Once the liqueur has been strained, pour it into clean, airtight bottles.
Can You Use Frozen Fruit?
Yes, you can use frozen fruit to make homemade fruit liqueur. This is a great option if you have fruit stored in your freezer or if fresh fruit isn’t available.
Freezing fruit breaks down some of the fruit’s cell structure, which can help release its flavor and color during the infusion process.
You can add frozen fruit directly to the sterilized jar, or allow it to thaw first. If you thaw the fruit, drain off any excess liquid before adding it to the jar.
Frozen berries and other soft fruits can break down more quickly during the infusion, so keep an eye on them as they infuse. You can generally follow the same 2-week timeframe for soft fruits and berries and 3–4 weeks for harder fruits.
Can You Mix Fresh and Frozen Fruit?
Yes. You can use a combination of fresh and frozen fruit in your homemade liqueur.
This can be particularly useful when you have a small amount of fresh fruit and some fruit that you’ve previously frozen. Just make sure the fruit is clean and in good condition before adding it to the jar.
Tips for Making Homemade Fruit Liqueur
Use good-quality fruit. Your finished liqueur will take on the flavor of the fruit, so ripe, flavorful fruit will give you the best results.
You don’t need expensive alcohol. An inexpensive vodka works well, although you can experiment with other types of alcohol depending on the flavor you’re trying to create.
Don’t overfill the jar. Fill the fruit to just below the neck and leave about ½ inch of space at the top after adding the alcohol.
Label your jars. Write the date on a piece of tape and put it on the jar. If you’re making multiple flavors, you may also want to write the fruit flavor on the label.
Give the jars a gentle shake every couple of days. This helps distribute the sugar and fruit throughout the alcohol.
Don’t rush the straining process. If you want a clear finished liqueur, give it a second strain through a fine-mesh sieve, cheesecloth, muslin, or a coffee filter.
Homemade Fruit Liqueur Gift Ideas
Homemade fruit liqueur makes a thoughtful gift because you can make several different flavors and package them in pretty bottles.
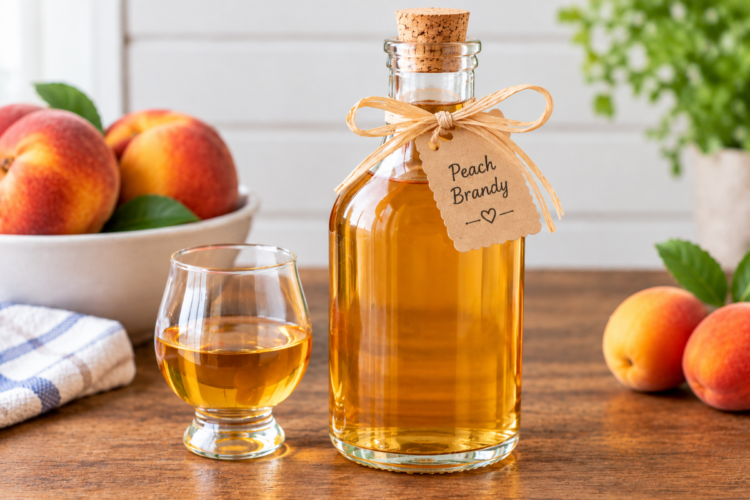
Once you’ve strained the finished liqueur, transfer it to clean, airtight decorative bottles. Add a simple label identifying the flavor, and tie a ribbon or piece of twine around the bottle for an easy homemade gift.
You could make several flavors at once and create a small assortment of homemade fruit liqueurs. Raspberry, peach, cherry, and apricot would make a colorful variety.
If you’re planning to give these as Christmas gifts, remember that the fruit needs approximately 2–4 weeks to infuse, so you’ll want to start your batches ahead of time.
Frequently Asked Questions
How long does it take to make homemade fruit liqueur?
Most homemade fruit liqueurs take 2 to 4 weeks to infuse. Soft fruits and berries generally take about 2 weeks, while harder fruits and fruits with pits usually take 3 to 4 weeks.
Can I use frozen fruit to make homemade liqueur?
Yes. Frozen fruit works well for homemade fruit liqueur and can be added directly to the jar. You can also thaw it first and drain any excess liquid before using it.
Do I have to thaw frozen fruit first?
No. You can use frozen fruit directly from the freezer. If you prefer to thaw it first, drain off any excess liquid before adding it to the jar.
What is the best fruit for homemade liqueur?
There isn’t one best fruit. Raspberries, strawberries, blackberries, peaches, cherries, plums, apricots, apples, melons, and pears can all be used. Softer fruits generally infuse faster, while harder fruits take longer.
Can I use different types of alcohol?
Yes. Vodka is an easy choice because it has a relatively neutral flavor, but you can experiment with other types of alcohol depending on the fruit and flavor you want.
Does homemade fruit liqueur need to sit for months?
No. Most fruit liqueurs only need about 2 to 4 weeks for the fruit to infuse the alcohol. Soft fruits and berries generally need less time, while harder fruits take longer. The exact timing depends on the type of fruit and your flavor preference; taste it before straining. The longer it infuses, the more fruit flavor it will have.
How do I make homemade liqueur clearer?
After removing the larger fruit pieces with a colander, strain the liqueur again through a fine-mesh sieve. For an even clearer result, you can line the sieve with cheesecloth, muslin cloth, or use a coffee filter.
Can I make homemade fruit liqueur as a gift?
Yes. Once the fruit has been strained out, transfer the finished liqueur to clean, airtight decorative bottles. Add a label and ribbon for a simple homemade gift.
Homemade Fruit Liqueur
Homemade fruit liqueur is a fun recipe to experiment with because you can use different fruits to create your own flavors. It’s also a great way to use fruit from your garden, farmers market finds, or fruit you’ve saved in the freezer.
The actual hands-on work is minimal. Once you’ve filled your jar with fruit, sugar, and alcohol, you simply give it a gentle shake every couple of days and let the fruit infuse.
After a few weeks, strain out the fruit, filter the liqueur if desired, and transfer it to bottles. Whether you’re making a batch for yourself or putting together homemade gifts, this is an easy project that produces something special.
You May Also Like:
Homemade Fruit Liqueurs
Ingredients
- 1 Quart size jar (one jar per flavor)
- 2½-4 cups fruit of choice or enough to fill the jar
- 1 cup granulated sugar
- Vodka
Instructions
- Sterilize your jars & allow to cool
- Fill with your fruit of choice to just below the neck of the jar. For fruits with pits, prepare the fruit by cutting them in half and removing the pits, or prick the skins deeply with a clean fork if leaving them whole.
- Add sugar
- Fill the jar with your liquor of choice, leaving a space of about half an inch at the top.
- Put on lid making sure your seal is tight.
- Add a strip of tape & write the date on it
- Close the jar and give it a gentle shake, then place it in a cool, dry area out of direct sunlight.
- Shake the jar every couple of days
- Most fruit liquors are ready in 2-4 weeks. Soft fruits and berries take about two weeks, while hard fruits and fruits with pits take 3-4 weeks.
- Strain out the fruit pieces through a colander
- For a clearer liquid, pour the mixture through a fine-mesh sieve or a colander lined with cheesecloth, muslin cloth, or even a coffee filter.
- Transfer to air tight decorative bottles if giving as a gift.

- High Quality Glass Jars: Each glass mason jar is made of thick glass and corrosion resistant lid for maximum durability and convenience. Clear glass jars make it easy to view the canning jar's contents and determine if they’re spoiled. The glass jar is Dishwasher safe, and the lid is best washed by hand.
- Tightly Sealed and Easy to Use: Each jar is equipped with an airtight split lid and band to ensure a tight seal to prevent leakage and excellent for canning and preserving fruits and vegetables, while still being easy to open and close. You can make large batches of your favorite preserves, meal preps and overnight oats.
- Perfect for Canning and Storage: The wide mouth enables easy accessibility to the bottom of the jar, makes it easy to fill or empty plump fruits, perfect for canning homemade pickles, tomatoes and peppers. Ideal for storing herbs, sauces, beans and dry spices, sugar, candy, nuts and more!
- Great for Crafting and Decor : These smooth jars are also great for homemade projects, like bath and body products, flower vases, homemade candles and more. You can use these mason jars to decorate your party or make unique creations and gifts such as wedding favors, shower favors and party favors.
- Package Include: Each set contains 12 pack 32 OZ Mason jars with silver screw lids, comes with 24 pcs labels, 20pcs writing tags, 1 cleaning brush and a bundle of twine. If there is any problem with the mason jars received, you can contact us directly and we will solve this problem as soon as possible.

- 8 oz Set of 9: Includes 9 clear swing top glass bottles, each with a 8 fl oz capacity. The transparent design makes contents easy to identify for organized brewing, serving, and pantry storage.
- Airtight Flip Top Lids: Each flip top glass bottle has a stainless steel wire closure, reusable cap, and thick silicone gasket that helps create a tight, leak-resistant seal to maintain freshness during storage.
- Durable and Reusable: Thick clear glass supports repeated use for beverage storage. The smooth bottle body is easy to rinse, while the removable swing top assembly allows more thorough cleaning.
- Made for Home Brewing: Use as kombucha bottles, beer bottles, or soda bottles, and for water, juice, kefir, cider, and other cold beverages. The resealable lids make serving and storage convenient.
- Versatile Pantry Storage: These glass bottles with lids also work for vanilla extract, syrup, vinegar, and infused oils. The glass bottle bodies are dishwasher safe, and the removable caps and gaskets can be cleaned separately.
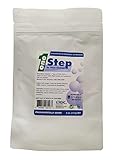
- Clean your beer- and wine-making equipment quickly and easily with the non-toxic, oxygen-based One Step No-Rinse Cleanser
- and non-harsh, One Step uses no acids and no chlorine, which can leave a film on glass and corrode stainless steel
- All you need is 1 tablespoon and 2 minutes of contact time. No rinsing needed. Safe to use on any of your beer- and wine-brewing equipment