This post may contain affiliate links. Please see my disclosure policy for more information.
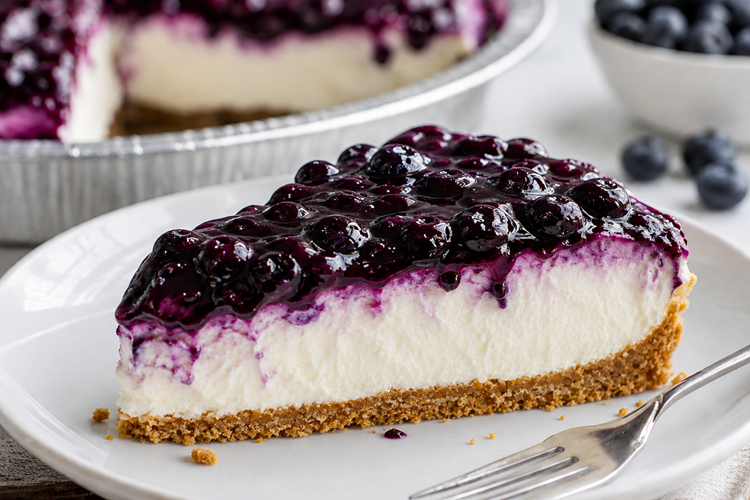
No-Bake Huckleberry Cheesecake
I am extremely lucky to live in an area where huckleberries grow wild. One of my favorite summer traditions is heading up into the mountains with my family to pick fresh huckleberries. There’s something special about spending the day outdoors and coming home with enough berries to make homemade desserts like this one.
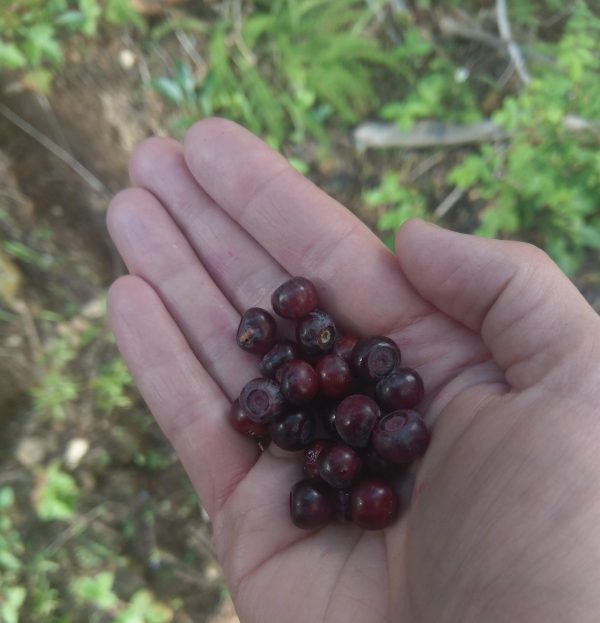
This easy no-bake huckleberry cheesecake has become one of my family’s favorites. It’s creamy, light, and topped with a sweet-tart homemade huckleberry sauce that really lets the berries shine. It’s perfect for summer gatherings, holiday dinners, or anytime you’re craving an easy dessert that doesn’t require turning on the oven.
Why You’ll Love This Recipe
- No baking required
- Light, creamy cheesecake filling
- Homemade huckleberry topping
- Easy enough for beginners
- Great for making ahead
- Perfect for summer berry season
Can You Use Other Berries?
Fresh or frozen blueberries make an excellent substitute if you can’t find huckleberries. I’ve also made this topping with raspberries, and it’s just as delicious.
If you’re looking for an even quicker dessert, you can skip making the homemade topping and simply spoon your favorite canned pie filling over the cheesecake. I’ve used cherry, peach, blueberry, and lemon pie filling over the years, and they’re all delicious. That said, huckleberry is still my family’s favorite.
About the Graham Cracker Crust
For this recipe, I used a store-bought graham cracker crust because I was sending the cheesecake home with my son and wanted him to have a disposable pan with a lid that he didn’t need to return.
Whenever I use a pre-made crust, I like to bake it according to the package directions before filling it. I think it tastes better and holds together much more nicely when serving.
If you’d rather make your own crust, you can easily use a homemade Graham Cracker Crust recipe instead.
A Recipe That Changes Every Time
This was actually one of the hardest recipes for me to write down because I’ve never really followed a recipe when making it. I usually just mix everything together by memory and adjust it as I go. Every batch ends up just a little different, but that’s part of what makes homemade desserts so much fun.
The cheesecake filling is simple and comes together in just a few minutes using cream cheese, powdered sugar, whipped topping, and a little vanilla if you like.
Sometimes I use powdered sugar, and sometimes I substitute granulated sugar instead. Both versions taste great, but I find the powdered sugar blends into the cream cheese a little more smoothly for an extra creamy filling.
Making the Homemade Huckleberry Topping
I’ve never measured the ingredients for the topping very carefully-I usually eyeball everything and taste as I cook.
If it isn’t sweet enough, I simply add a little more sugar. If it needs to thicken, I stir in a bit more cornstarch. If it becomes too thick or too sweet, I add a splash of water or a few extra berries to balance it back out.
Most of the time I use frozen huckleberries because that’s what I have stored in the freezer after berry season. Fresh huckleberries work just as well, although you may need to add a little extra water since frozen berries release more juice as they cook.
Huckleberries are naturally a bit tarter than blueberries, so if you’re substituting blueberries, you may want to reduce or adjust the sugar to suit your taste.
Ingredients
Cheesecake
- 1 graham cracker pie crust (store-bought or Homemade Graham Cracker Crust)
- 1 (8-ounce) package cream cheese, softened
- ½ cup powdered sugar
- 1 (8-ounce) container whipped topping, thawed
- 1 teaspoon vanilla extract (optional)
Huckleberry Topping
- 1½ cups huckleberries
- ¼ cup granulated sugar (add more if your berries are especially tart)
- 1 tablespoon cornstarch
- Pinch of salt
- 2 tablespoons cold water
How to Make No-Bake Huckleberry Cheesecake
Step 1: Make the Cheesecake Filling
Using an electric mixer, beat the softened cream cheese and powdered sugar until smooth and creamy.
Mix in the vanilla extract, if using.
Gently fold in the whipped topping until everything is evenly combined.
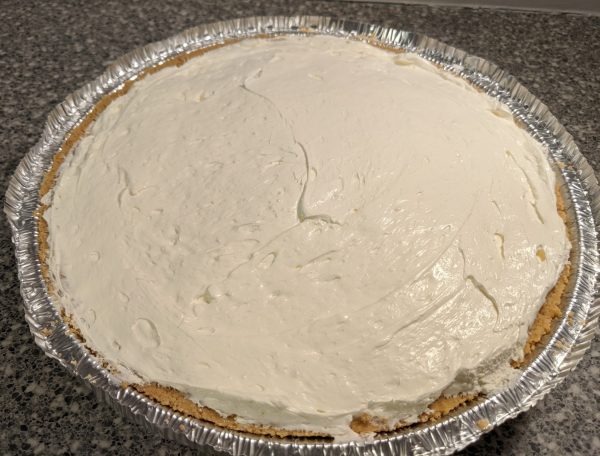
Spoon the filling into the graham cracker crust and spread it into an even layer. Refrigerate while you prepare the topping.
Step 2: Prepare the Huckleberry Topping
In a medium saucepan, combine the huckleberries, sugar, cornstarch, salt, and water.
Cook over medium-low heat, stirring frequently. As the berries soften, gently break up some of them with your spoon to release more juice and flavor.
Continue cooking until the mixture begins to simmer and thicken, which usually takes only a few minutes.
Allow the topping to cool slightly before spreading it over the cheesecake.
Refrigerate the cheesecake for at least 2 hours before serving so the filling can fully set.

Tips for Success
- Let the cream cheese soften completely before mixing.
- Chill the cheesecake for several hours before slicing for the cleanest cuts.
- Frozen berries work just as well as fresh.
- Taste the topping before removing it from the heat and adjust the sweetness if needed.
- For neat slices, dip your knife in warm water and wipe it clean between cuts.
Storage
Store leftover cheesecake covered in the refrigerator for up to 4 days.
While you can freeze the cheesecake, the whipped topping may change texture slightly after thawing. If freezing, wrap it tightly and enjoy within one month.
Frequently Asked Questions
Can I use blueberries instead of huckleberries?
Absolutely! Blueberries are the closest substitute and make an excellent topping. You may want to use a little less sugar since blueberries are often sweeter than huckleberries.
Can I make this ahead of time?
Yes. In fact, it’s even better after chilling for several hours or overnight.
Can I use canned pie filling?
Definitely, Cherry, blueberry, peach, lemon, or any favorite pie filling can be spooned over the cheesecake for an even faster dessert.
Do I have to use vanilla?
No. The vanilla adds a little extra flavor, but the cheesecake is delicious without it.
Whether you’ve spent the day picking wild huckleberries or you’re using berries from the freezer, this no-bake huckleberry cheesecake is one of those desserts that’s always a hit. It’s creamy, refreshing, and easy enough to make anytime you’re craving something sweet. For my family, though, nothing beats the flavor of homemade huckleberry topping made from berries we picked ourselves.

Huckleberry Cheesecake
Ingredients
- 1 graham cracker crust
- 1 8 oz cream cheese, softened
- ½ cup powdered sugar
- 1 8 oz tub whipped topping (thawed)
- 1 tsp vanilla extract (optional)
Huckleberry Topping
- 1½ cups huckleberries
- ¼ cup granulated sugar (add more if the berries are really tart)
- 1 Tbsp cornstarch
- 1 pinch of salt
- 2 Tbsp cold water
Instructions
- With an electric mixer beat cream cheese and sugar until smooth and creamy. Mix in vanilla (optional) and fold in the whipped topping. Spoon into the graham cracker crust. Refrigerate.
Huckleberry Topping
- In a medium saucepan, mix together huckleberries, sugar, cornstarch, salt, and water.
- Cook over medium/low heat stirring frequently breaking up some of the berries until the mixture simmers and thickens. Let cool slightly before spreading it on top of the cheesecake. Refrigerate for a couple of hours before serving.
Nutrition

- One 6 ounce ready-to-eat Graham Cracker Pie Crust
- Some of your favorite Amazon Fresh products are now part of the Amazon Grocery brand! Although packaging may vary during the transition, the ingredients and product remain the same. Thank you for your continued trust in our brand
- No synthetic colors
- No added preservatives
- Amazon Grocery has all the favorites you love for less. You’ll find everything you need for great-tasting meals in one shopping trip

- Keebler Ready Pie Crust, Graham Cracker, 10 in

- PIE SERVER WITH SERRATED EDGE ON BOTH SIDES: The Orblue Pie Server smoothly and neatly slices through pies with ease. Unlike most pie servers, this tool has serrated edges on both sides so it is easy to use by both right-handed AND left-handed chefs
- HIGH QUALITY RUST RESISTANT STAINLESS STEEL: This cutting and serving tool consists of a high quality and durable rust resistant stainless steel, made to withstand rigorous long term use.
- ERGONOMIC HANDLE: Handle on this kitchen flatware cake knife has an ergonomic shape that allows for a comfortable and secure grip.
- DISHWASHER SAFE: Simply toss in the dishwasher for easy and convenient clean-up.
- VERSATILE KITCHEN TOOL: This will be one of your favorite serving utensils and baking tools. Great for slicing a wedding cake or even as a pizza cutter, this will surely make your life easy as pie!

- Serrated edges on both sides for left- and right-handed home cooks
- Flexible-yet-sturdy head can easily slide under food and lift it
- Great for cake, pie, quiche, pizza, and more
- Sleek stainless steel handle feels comfortable in your hand