
This post may contain affiliate links. Please see my disclosure policy for more information.
Bread Machine Cinnamon Rolls
If you love homemade cinnamon rolls but don’t love the time and work it takes to make them from scratch, these Bread Machine Cinnamon Rolls are worth trying! Let your bread machine do most of the hard work by mixing and kneading the dough for you. Once the dough cycle is finished, all you have to do is roll, fill, slice, and bake.
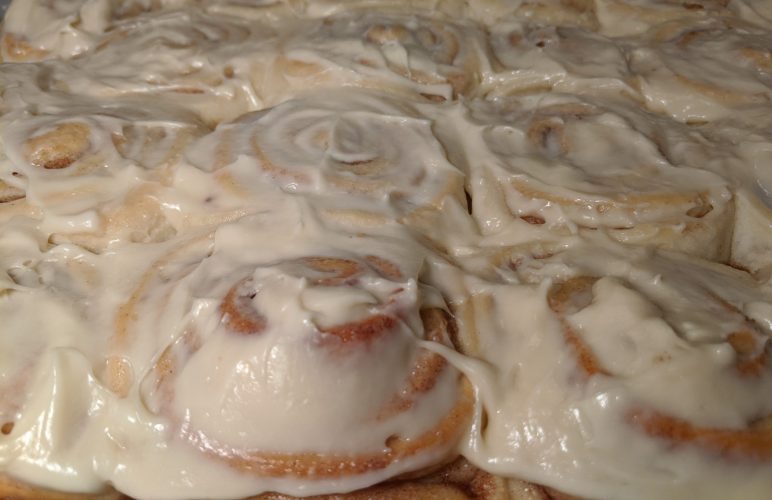
These homemade cinnamon rolls are soft, buttery, and filled with cinnamon sugar. Top them with homemade cream cheese frosting while they’re still warm, and you have a delicious breakfast or sweet treat that your whole family will love.
I like making a batch of these because the recipe makes approximately 20 cinnamon rolls. You can also adjust how close you place them on the baking sheet depending on whether you prefer soft sides or rolls with a little more golden-brown crust.
Ingredients for Bread Machine Cinnamon Rolls
Dough Ingredients
- 1⅓ cups lukewarm water
- ½ cup room-temperature butter, cut into pieces
- 5 tablespoons sugar
- 1 egg
- 1 teaspoon salt
- 4½ cups all-purpose flour
- ¼ cup powdered milk
- 1 tablespoon active-dry yeast
If you don’t have powdered milk, you can substitute regular milk. Use 1 cup warm milk and ⅓ cup warm water in place of the 1⅓ cups water and powdered milk.
Cinnamon Roll Filling
- 1 cup sugar (white or brown sugar)
- 1½ tablespoons ground cinnamon
- ½ cup softened or melted butter
Cream Cheese Frosting
- 4 ounces cream cheese, softened
- ¼ cup butter, softened
- 1½ cups powdered sugar
- 1½ teaspoons milk
- 1 teaspoon vanilla
How to Make Bread Machine Cinnamon Rolls
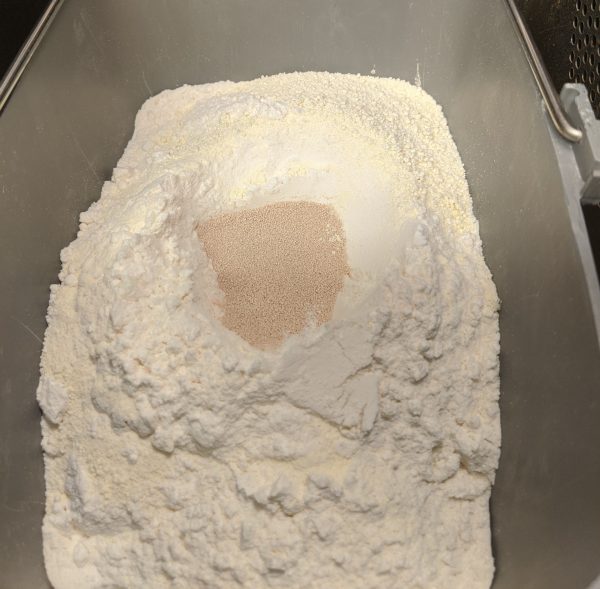
Step 1: Make the Dough in Your Bread Machine
Place the dough ingredients into your bread machine in the order listed, following your machine manufacturer’s recommendations for adding ingredients.
Set your bread machine to the dough cycle. The machine will mix, knead, and allow the dough to rise, saving you quite a bit of work.
When the dough cycle is finished, remove the dough and divide it into two equal portions.
Step 2: Roll Out the Dough
Lightly flour your work surface and rolling pin. Take one portion of dough and roll it into a rectangle about ¼ inch thick.
It doesn’t have to be a perfect rectangle. Just try to keep the thickness fairly even so the cinnamon rolls bake evenly.
Step 3: Add the Cinnamon Sugar Filling
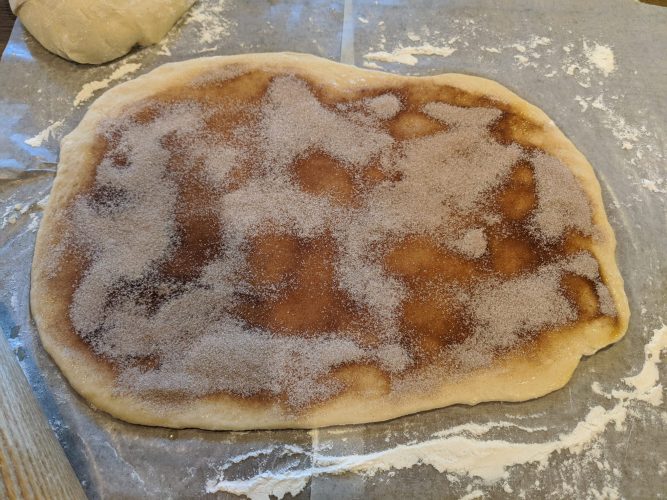
Spread half of the softened or melted butter over the surface of the dough.
In a small bowl, combine the sugar and ground cinnamon. Sprinkle half of the cinnamon sugar mixture evenly over the butter, covering as much of the dough as possible.
A little tip about the sugar: I’ve tried both white sugar and brown sugar in these cinnamon rolls. Brown sugar creates a gooier, syrup-like filling when combined with the butter. White sugar stays a little more granular and lets the cinnamon flavor stand out. Both are delicious, so it really comes down to personal preference.
Step 4: Roll and Slice the Cinnamon Rolls
Starting at one of the short ends of the rectangle, roll the dough tightly into a log.
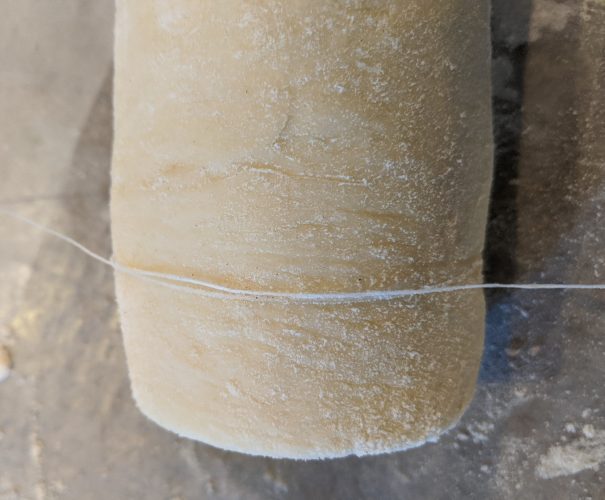
I like using dental floss to cut my cinnamon rolls. Slide a piece of unflavored dental floss underneath the dough, cross the ends over the top, and pull. It cuts through the dough cleanly without squishing the rolls like a knife sometimes can.
Cut the dough into approximately 1-inch slices. When turned on their sides, the slices will have that familiar cinnamon roll pinwheel shape.
Repeat the process with the second portion of dough.
Step 5: Let the Cinnamon Rolls Rise
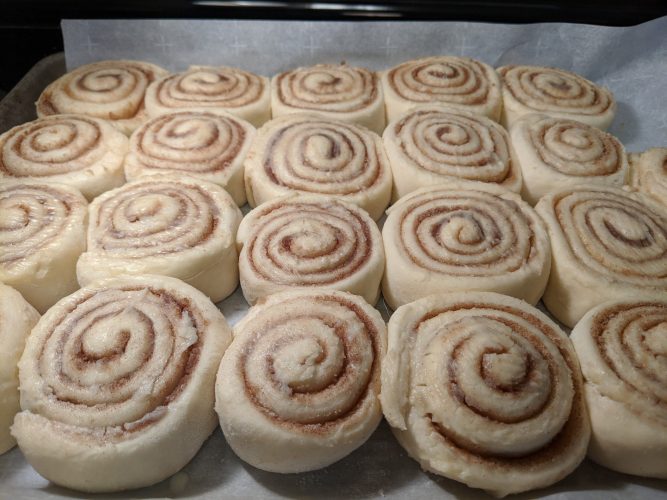
Place the cinnamon rolls on a greased or parchment-lined baking sheet.
For softer cinnamon rolls, arrange them so they are just slightly touching. They will expand as they rise and bake.
If you prefer cinnamon rolls with more browned edges, space them about 1–2 inches apart.
Cover the rolls with a lightweight, clean kitchen towel and let them rise for approximately 25–30 minutes.
Step 6: Bake the Cinnamon Rolls
Preheat your oven to 350°F.
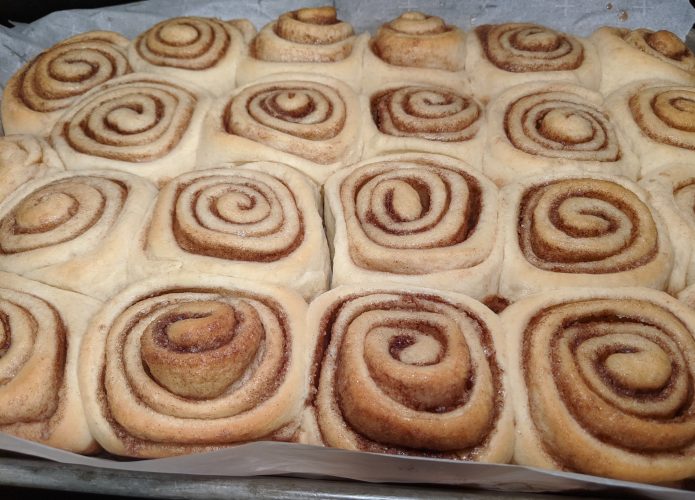
Bake the cinnamon rolls for approximately 20 minutes, or until the tops are lightly golden brown.
To check for doneness, gently tap the center of a roll. It should feel firm and spring back rather than feel doughy or squishy.
Allow the cinnamon rolls to cool for about 5–10 minutes before adding the frosting.
Step 7: Make the Cream Cheese Frosting
While the cinnamon rolls are cooling slightly, prepare the cream cheese frosting.
In a mixing bowl, beat together the softened cream cheese and butter until smooth. Add the powdered sugar, vanilla, and milk. Mix until everything is well combined and the frosting is creamy.
Spread the frosting over the warm cinnamon rolls.
I love serving these while they’re still warm. The cream cheese frosting softens slightly and spreads over the tops of the rolls without completely melting away.
Tips for Making the Best Bread Machine Cinnamon Rolls
Use room-temperature butter. Softened butter is easier to spread over the dough and helps distribute the cinnamon filling evenly. Melted butter works too, but it can sometimes run over the edges.
Don’t skip the second rise. After cutting and arranging the cinnamon rolls, give them 25–30 minutes to rise. This helps create soft, fluffy rolls.
Use dental floss to cut the rolls. This is one of my favorite tricks! Dental floss makes clean cuts without flattening the dough. Just make sure it’s unflavored.
Choose your favorite sugar. Brown sugar makes a gooier filling, while white sugar gives you a more traditional cinnamon flavor. You can even use a combination of both.
Adjust the spacing. Rolls placed close together will have softer sides, while rolls spaced farther apart will develop more golden-brown edges.
Don’t frost them straight out of the oven. Let them cool for 5–10 minutes first. If they’re too hot, the frosting will melt and slide right off.
How to Store Homemade Cinnamon Rolls
At Room Temperature: Store leftover cinnamon rolls in an airtight container for up to 1–2 days. Since these have cream cheese frosting, refrigerating them is the better option for longer storage.
In the Refrigerator: Place the cinnamon rolls in an airtight container and refrigerate for up to 4–5 days.
In the Freezer: You can freeze baked cinnamon rolls for up to 2–3 months. For best results, freeze them without the frosting and add fresh cream cheese frosting after reheating.
To reheat, microwave an individual cinnamon roll for about 15–20 seconds, adding a few more seconds if needed. Heating times will vary depending on the size of the roll and your microwave.
Frequently Asked Questions
Can I use regular milk instead of powdered milk?
Yes! If you don’t have powdered milk, substitute 1 cup of warm milk and ⅓ cup of warm water for the 1⅓ cups of water and powdered milk called for in the recipe.
Can I use brown sugar instead of white sugar?
Absolutely! Brown sugar is delicious in cinnamon rolls. It creates a richer, gooier filling when combined with the butter. White sugar gives the filling a slightly different texture and lets the cinnamon flavor stand out more.
Why do I need to let the cinnamon rolls rise after cutting them?
The second rise allows the dough to become light and fluffy before baking. Skipping this step can result in denser cinnamon rolls.
Can I make cinnamon rolls ahead of time?
Yes. You can assemble the cinnamon rolls, place them on your baking sheet, cover tightly, and refrigerate overnight. The next morning, allow them to sit at room temperature and finish rising before baking. They may need a little extra time if they’re still cold.
How do I keep cinnamon rolls soft?
Don’t overbake them, and avoid spacing them too far apart if you prefer soft sides. Storing leftovers in an airtight container also helps keep them from drying out.
Can I freeze homemade cinnamon rolls?
Yes! Baked cinnamon rolls freeze well. Let them cool completely, wrap them tightly, and store them in a freezer-safe container. I recommend freezing them without the cream cheese frosting and adding that after reheating.
These Bread Machine Cinnamon Rolls are an easy way to enjoy homemade cinnamon rolls without spending all morning making the dough by hand. Whether you’re making them for a weekend breakfast, holiday morning, or just because you’re craving something sweet, they’re a delicious treat!

Bread Machine Cinnamon Rolls
Ingredients
- 1⅓ cups lukewarm water
- ½ cup room-temperature butter, cut up
- 5 tbsp sugar
- 1 egg
- 1 tsp salt
- 4½ cups all-purpose flour
- ¼ cup powdered milk (If you don't have powdered milk, you can substitute 1 cup of milk for the water. Make it with 1 cup of warm milk and ⅓ cup of warm water)
- 1 Tbsp active-dry yeast
Filling
- 1 cup sugar (white or brown sugar)
- 1½ Tbsp ground cinnamon
- ½ cup softened or melted butter
Cream Cheese Frosting
- 4 ounces cream cheese, softened
- ¼ cup butter, softened
- 1½ cups powdered sugar
- 1½ tsp milk
- 1 tsp vanilla
Instructions
- Place the ingredients for the dough in your bread machine in the order listed.
- Run your machine on the dough cycle.
- When the dough is done, take it out and split the dough into two mounds.
- On a well-floured surface, roll one mound of your dough out into a rectangle. It doesn’t need to be a perfect rectangle. Roll out to 1/4 - 1/2 inch thickness.
- Filling - Spread half of the melted or softened butter over the rolled-out dough. Combine the sugar and cinnamon. Sprinkle half of the cinnamon sugar over the melted butter making sure to cover as much surface with the filling as you can.
- Starting at one of the short ends of your rectangle of dough, roll it up tightly.
- Slice the dough into about 1-inch pieces. The result will be a pinwheel-shaped form when turned on its side.
- Place pinwheels on a greased or parchment-lined baking sheet. For soft rolls, line them up so they are just touching each other slightly, not too close, as they will get bigger as they rise. For each roll to have a browned outside, spread them 1-2 inches apart on the sheet.
- Repeat the process with the second mound of dough. Cover the assembled dough with a lightweight hand towel and let it rise for 25-30 minutes.
- Bake at 350 for 20 minutes or until lightly browned on top. Tap the middle of the roll to see if it bounces back. If it does, it’s probably done!
Cream Cheese Frosting
- In a mixing bowl, beat together the cream cheese and butter. Add powdered sugar, vanilla, and milk. Mix until well blended. Frost warm rolls.
Nutrition

- Package Includes: One (1) Reynolds Kitchens Unbleached Parchment Paper Roll measuring 45 feet long by 12 inches wide (45 square feet total)
- Easy and Quick Cleanup: The 12-inch wide baking parchment paper easily lines most sheet pans and cookie sheets for easy clean-up
- Unbleached and Chlorine-Free: This unbleached parchment paper is made with 75% unbleached fibers and 0% chlorine bleaching
- Dependable, Non-Stick, and Versatile: Reynolds parchment paper can be used for cooking, baking, and in the microwave, and is oven-safe up to 425 degrees Fahrenheit
- Quality Parchment Paper: Reynolds parchment paper is your go-to solution for easy cooking and clean-up


- SHIPMENT CONTAINS: 90 square feet of parchment paper, 24 yards x 15 inches per roll for all your baking needs
- PERFECT FIT: 15-inch width fits perfectly into most standard baking pans for convenient food preparation
- OVEN SAFE: Cooking paper withstands high temperatures up to 425 degrees and prevents food from sticking to the pan
- VERSATILE USE: Ideal for baking cookies, cakes, bread and lining pans for roasting vegetables and other foods
- NON-STICK SURFACE: Prevents food from sticking to pans, making cleanup easy and quick

- SET OF 3 BAKING SHEETS: GoodCook’s Nonstick Cookie Sheet Set comes with a small 13” x 9”, medium 15” x 10” and large 17” x 11” baking sheet to provide the perfect options for any of your baking needs.
- EVEN BAKE, EVERY TIME: The heavy-duty gauge baking pans in this bakeware set ensure long-lasting durability and even heat distribution, providing thorough baking for delicious results.
- MADE WITH DURABLE CARBON STEEL: Constructed from carbon steel material, these kitchen pans resist warping and scratching to provide long-lasting durability and maintain daily use in your home kitchen.
- SCRATCH-RESISTANT NONSTICK COATING: This baking set features a scratch-resistant nonstick coating for a mess-free release to serve your baked goods from the pan. It is a GoodCook exclusive formula that performs better than other single-coat systems.
- DISHWASHER SAFE: This nonstick bakeware set is dishwasher safe for easy cleanup after use, however, hand washing is recommended for longer-lasting use.

- 17x11-INCH COOKIE SHEET: Ensures a perfect bake every time for your favorite recipes, from cookies and other desserts to sheet pan dinners. This large baking sheet is perfect for all your baking needs.
- PROVIDES EVEN HEAT DISTRIBUTION: Distributes heat evenly for thorough baking. The wider lip on the sides of the pan makes it easier to grasp, ensuring safe handling when getting it in and out of the oven.
- SCRATCH-RESISTANT NONSTICK COATING: Scratch-resistant and dishwasher-safe nonstick coating provides excellent release while also making clean up quick and easy. This nonstick baking sheet is designed for convenience.
- CONVENIENT AND VERSATILE: Metal spatula safe, allowing you to serve your baked goods right off the sheet. This versatile baking tray is a must-have for any kitchen.
- MADE WITH DURABLE STEEL: Made with heavy-duty gauge steel to resist warping and offer high-quality baking for years to come. This cookie sheet is built to last and provide reliable performance.