This post may contain affiliate links. Please see my disclosure policy for more information.
Zucchini Brownies
If you have more zucchini from your garden than you know what to do with, these Zucchini Brownies are a delicious way to use it up! They are easy to make with simple pantry ingredients, and the zucchini helps create wonderfully moist brownies without adding eggs.
I make these zucchini brownies every year when I have extra zucchini from my garden. I love finding ways to use fresh garden zucchini in recipes, especially desserts where you don’t really notice the zucchini.
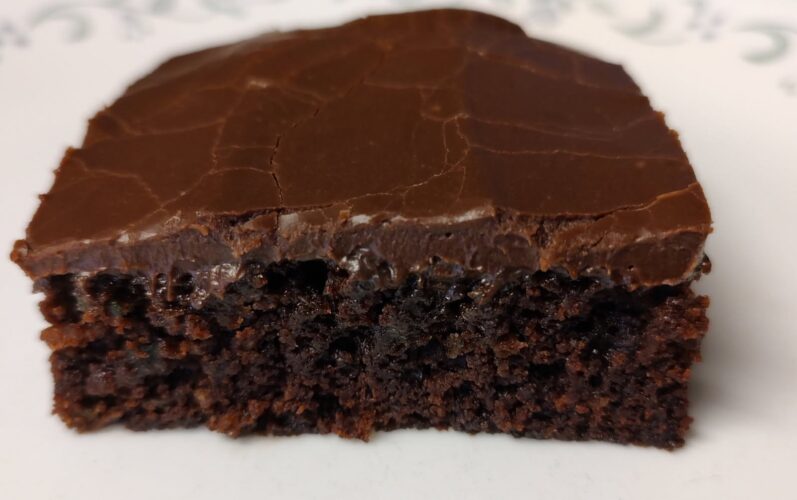
These brownies have a soft, chocolatey texture that’s somewhere between a brownie and a soft chocolate cake. Add the chocolate frosting on top, and you have an easy homemade dessert that is perfect for using up that summer zucchini.
Why You’ll Love These Zucchini Brownies
- Great way to use garden zucchini: This is one more recipe to add to your list when the zucchini plants are producing faster than you can use them.
- No eggs needed: You don’t need eggs for this recipe. The zucchini provides the moisture the batter needs.
- Simple ingredients: You probably already have most of the ingredients in your pantry.
- Rich chocolate flavor: Unsweetened cocoa powder gives the brownies plenty of chocolate flavor.
- Easy homemade frosting: The simple chocolate frosting takes these brownies to the next level.
Easy Zucchini Brownies Recipe
Ingredients
- ½ cup vegetable oil
- 1½ cups white sugar
- 2 tsp vanilla extract
- 2 cups all-purpose flour
- ½ cup unsweetened cocoa powder
- 1½ tsp baking soda
- 1 tsp salt
- 2 cups shredded zucchini
Frosting
- 6 Tbsp unsweetened cocoa powder
- ¼ cup butter, melted
- 2 cups powdered sugar
- ¼ cup milk
- 1 tsp vanilla extract
How to Make Zucchini Brownies
These zucchini brownies are very easy to make, but there is one important thing to know before you start: Don’t squeeze the moisture out of the zucchini. The liquid released from the zucchini is what provides the moisture needed for the brownie batter.
1. Prepare the Pan
Preheat your oven to 350°F. Grease and flour a 9×13-inch baking pan, or line with parchment paper, or use a Silpat mat and set it aside.
2. Mix the Wet Ingredients
In a large mixing bowl, combine the vegetable oil, white sugar, and vanilla extract. Stir until everything is well blended.
3. Add the Dry Ingredients
In a separate bowl, combine the all-purpose flour, unsweetened cocoa powder, baking soda, and salt.
Add the dry ingredients to the sugar and oil mixture and stir until combined.
4. Add the Zucchini
Fold the 2 cups of shredded zucchini into the batter.
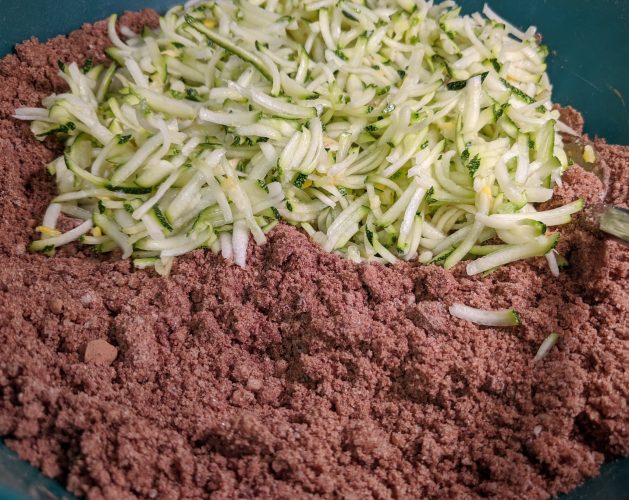
At this point, don’t be surprised if the mixture seems very dry. It may not look like a typical brownie batter at first.
Let the mixture sit for a few minutes. The zucchini will begin releasing its moisture, which will make the batter easier to stir. Give it another good stir once the zucchini has released some of its liquid.
Don’t add extra water or milk to the brownie batter. The zucchini provides the moisture this recipe needs.
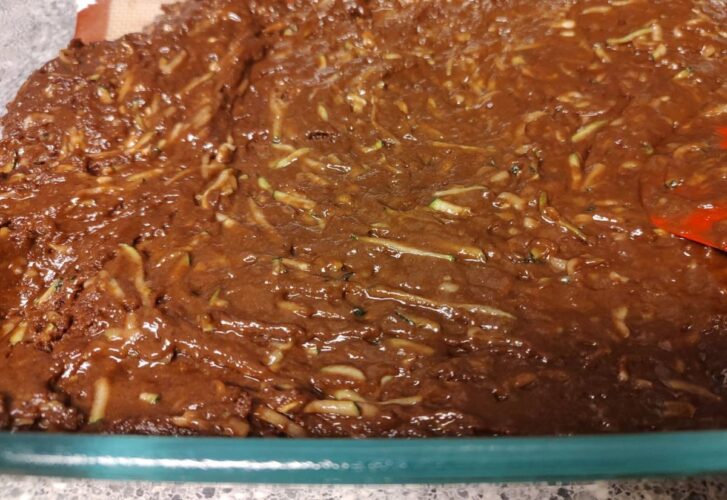
Once the batter comes together, spread it evenly into the prepared baking pan.
5. Bake the Brownies
Place the pan in the preheated oven and bake for 25 to 30 minutes.
The brownies are done when the edges just start to pull away from the sides and they spring back when gently touched. Be careful not to overbake them, since you want the finished brownies to have a soft texture.
Let the brownies cool before adding the frosting.
6. Make the Chocolate Frosting
While the brownies are cooling, prepare the frosting.
Melt the butter and add the unsweetened cocoa powder; mix together with a fork, making sure there are no lumps, then set the mixture aside to cool slightly.
In another bowl, combine the powdered sugar, milk, and vanilla extract. Stir into the cocoa and butter mixture until the frosting is smooth and well combined.
7. Frost and Cut
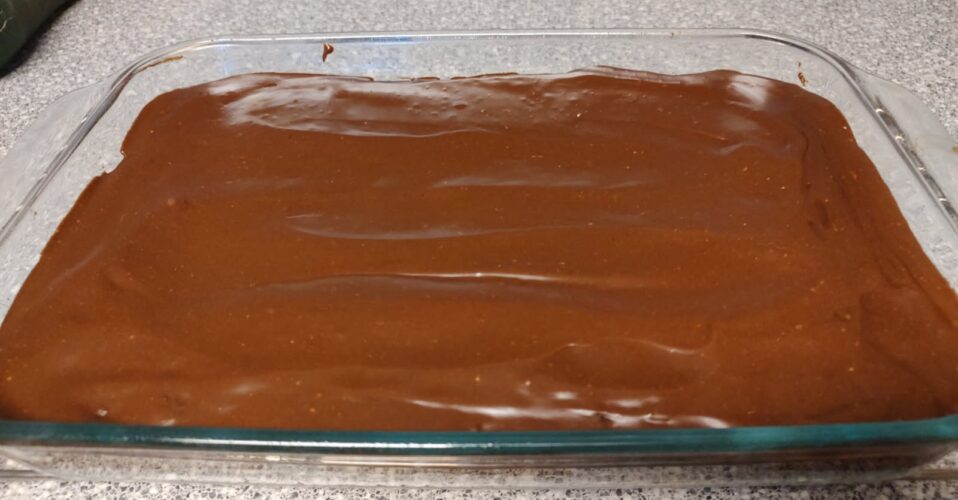
Spread the chocolate frosting evenly over the cooled brownies.
Cut the brownies into squares and serve.
I especially like these brownies with the chocolate frosting, but the brownies are still delicious on their own if you prefer to skip the frosting.
Tips for Making Zucchini Brownies
Don’t squeeze the zucchini. This is probably the most important tip for this recipe. The zucchini provides the moisture for the brownies, so you want to keep all of that liquid.
Don’t worry if the batter looks dry. The mixture can look much too dry before the zucchini has had a chance to release its moisture. Let it sit for a few minutes after adding the zucchini, then stir again.
Don’t add eggs. These brownies are designed to be made without eggs. Adding eggs can change the texture and make the brownies more cake-like.
Use freshly shredded zucchini when possible. Fresh zucchini tends to have plenty of moisture, which is exactly what this recipe needs.
Let the brownies cool before frosting. If the brownies are still warm, the frosting can become too thin and difficult to spread.
For easier cleanup, line your baking pan with parchment paper after greasing it. Leave a little overhang on the sides so you can lift the cooled brownies from the pan before cutting.
Zucchini Brownie Variations
These zucchini brownies are delicious as written, but you can easily change them up with different mix-ins, swirls, or frosting. Here are a few ideas to try:
Add Walnuts or Pecans
For a little crunch, fold ½ to ¾ cup of chopped walnuts or pecans into the brownie batter along with the zucchini. You can use either one or a combination of both.
Add Pretzel Pieces
For a sweet and salty brownie, add ½ cup of broken pretzel pieces to the batter. You can also sprinkle a few extra pieces over the top before baking. The salty pretzels are a great contrast to the rich chocolate brownies.
Add Chocolate Chips
Gently mix in 1/2 cup to 1 cup of semi-sweet, milk, dark chocolate, or white chips right before pouring the batter into your baking pan.
Caramel Swirl
For caramel zucchini brownies, drizzle ¼ to ½ cup of caramel sauce over the brownie batter after spreading it into the pan. Use a knife to gently swirl the caramel through the batter before baking.
You can also drizzle additional caramel over the cooled brownies before serving.
Cream Cheese Swirl
Turn these into cream cheese swirl zucchini brownies by adding a layer of sweetened cream cheese over the brownie batter. Drop spoonfuls of the cream cheese mixture over the top, then gently swirl it through the batter with a knife before baking.
The tangy cream cheese pairs especially well with the rich chocolate brownies.
Try a Different Frosting
You don’t have to use the chocolate frosting included with the recipe. Try topping the cooled brownies with a different frosting for an entirely different flavor.
Some good options include:
- Cream cheese frosting for a rich, tangy topping
- Vanilla frosting for a simple contrast to the chocolate brownies
- Peanut butter frosting for a chocolate and peanut butter combination
- Caramel frosting for extra caramel flavor
- Chocolate ganache for an especially rich chocolate topping
- White chocolate frosting for a sweeter, creamy topping
You could even combine some of these ideas. Try adding chopped pecans to the batter, swirling in caramel, and finishing the cooled brownies with cream cheese frosting for a decadent zucchini dessert.
Can You Taste the Zucchini?
Not really! The zucchini has a mild flavor and blends into the chocolate brownie batter. Once baked and covered with chocolate frosting, you won’t be sitting there thinking you’re eating vegetables.
That’s one of the reasons these brownies are such a good way to use extra garden zucchini.
Do You Need to Peel Zucchini for Brownies?
No, you don’t need to peel the zucchini before shredding it. The peel is tender and blends into the batter as the brownies bake.
If you’re using a very large, mature zucchini with tough skin, you can peel it if you prefer.
Can You Use Frozen Zucchini?
Yes, but frozen zucchini needs to be handled carefully. If you freeze shredded zucchini, thaw it before using it and drain off some of the liquid; do not discard all of the liquid. The moisture is important to this recipe.
Because frozen zucchini can vary in how much liquid it releases, the consistency of the batter may be slightly different from brownies made with fresh zucchini.
How Should You Store Zucchini Brownies?
Store the brownies in an airtight container at room temperature for a couple of days, or refrigerate them for longer storage.
If refrigerated, allow them to sit at room temperature for a little while before serving for the best texture.
Can You Freeze Zucchini Brownies?
Yes. These brownies can be frozen for longer storage. For best results, freeze them in an airtight freezer-safe container with parchment paper between layers.
You can freeze the brownies before or after frosting them. Thaw them in the refrigerator or at room temperature before serving.
More Ways to Use Garden Zucchini
If you have an abundance of zucchini from your garden, don’t stop with brownies! You can use zucchini in everything from breads and cakes to casseroles and savory side dishes.
These zucchini brownies are especially nice to make during the summer when zucchini is plentiful, and you want an easy dessert that doesn’t require a trip to the grocery store.
Zucchini Brownies
Ingredients
- ½ cup vegetable oil
- 1½ cups white sugar
- 2 tsp vanilla extract
- 2 cups all-purpose flour
- ½ cup unsweetened cocoa powder
- 1½ tsp baking soda
- 1 tsp salt
- 2 cups shredded zucchini
Frosting
- 6 Tbsp unsweetened cocoa powder
- ¼ cup butter
- 2 cups powdered sugar
- ¼ cup milk
- 1 tsp vanilla extract
Instructions
- Preheat oven to 350°. Grease and flour a 9x13-inch baking pan or line with parchment paper, or use a Silpat mat and set it aside.
- In a large mixing bowl, combine the vegetable oil, white sugar, and vanilla extract. Stir until everything is well blended.
- In a separate bowl, combine the all-purpose flour, unsweetened cocoa powder, baking soda, and salt.Add the dry ingredients to the sugar and oil mixture and stir until combined.
- Fold the 2 cups of shredded zucchini into the batter.Let the mixture sit for a few minutes. The zucchini will begin releasing its moisture, which will make the batter easier to stir. Give it another good stir once the zucchini has released some of its liquid. The batter will be thick. Spread it evenly into the prepared baking pan.
- Bake for 25 to 30 minutes in the preheated oven, until the edges of the brownies spring back when gently touched. Don't over-bake to prevent drying them out. Set aside to cool.
- Make frosting while the brownies cool. Melt ¼ cup of butter and add 6 Tablespoons of Cocoa powder. Stir with a fork to remove any cocoa lumps.
- Blend together the powdered sugar, milk, and 1 teaspoon of vanilla. Stir in the cocoa mixture until the frosting is smooth and well combined. Spread over cooled brownies before cutting into squares.
Nutrition

- 9x13 INCH: Includes (1) 9x13x2.75 inch glass baking dish with BPA-free plastic lid. This deep baking dish is essential to have in any kitchen as they are versatile in use from prepping to baking and storing.
- GO DEEPER: At up to 50% deeper than the Pyrex basics dishes you know and love, there’s more room to get creative. Deeper size stops spillovers, and more importantly, holds more of the good stuff for your parties and gatherings.
- SNUG FIT LID: Perfectly fitting and BPA-free plastic lid is freezer, microwave, and top-rack dishwasher safe. No need to hold back when warming your food or storing your leftovers for tomorrow.
- GLASS BAKEWARE: High-quality non-pourous glass is pre-heated oven, microwave and freezer safe. Have a peace of mind when storing your food, resisting stains, flavors and odors. Worry less about scrubbing hard to get rid of stains or smells, and enjoy the versatile convenience of this glass bakeware set.
- PYREX IS THE #1 BRAND OF GLASS BAKEWARE*: Loved for generations, experienced cooks and beginners alike have reached for Pyrex brand glassware products, because they’re affordable, durable, and great for all their cooking, serving and storing needs. Source: The NPD Group / Retail Tracking Service, dollars and units, 12 ME December 2022


- Meet Your Daily Needs: DOWAN larger and deeper ceramic baking dish measures 15.6"L x 9.3"W x 3.1" H (including handle size)-135 OZ, sized perfectly for cooking lasagna, casseroles, chicken, roast, bread, pasta, beef, and more. Whether you're cooking a family dinner or serving food, this versatile casserole dish has got you covered.
- Durable and Safe: Made from lead-free and pro-grade ceramic, this 4.2 quarts extra-large casserole dish is designed for safe use and durability. It can withstand high temperatures without cracking or breaking, and it is safe to use in dishwashers, refrigerators, microwaves, and ovens up to 500°F/260°C.
- Easy to Hold: With its double-handled design, the 9x13 rectangular baking dish is easy to carry from the oven or freezer to the table. Deep enough to hold everything with no overflow and you'll love how comfortable it is to hold, even when it's full of piping-hot food.
- Classic Design, Smooth Glaze: Ceramic soft white well-made lasagna pan boasts a timeless design that will never go out of style. The smooth glaze is easy to clean, It's also a charming addition to your kitchen and dining table and is sure to impress your guests.
- The Best Bakeware: This versatile dish is the perfect gift choice for weddings, housewarming, birthdays, gatherings, or Halloween holidays. Our rectangular baking dish is a must-have for experienced cooks and beginners alike. It's perfect for all your cooking, serving, and storing needs. Add it to your kitchen and start enjoying delicious, homemade meals in no time!

- Best German Silicone: We attach great importance to the health of our customers. Therefore, we use the best German WACKER silicone as the raw material in the industry. Food Grade, BPA Free, PFOA Free, Non-toxic. NOT made in Germany.
- Non-Stick Mat: Our baking mats feature a nonstick surface that allows for effortless food removal. No need for oil, cooking sprays, or parchment paper. The thickness of the mat is 0.75MM, which is much thicker than most other mats.
- Easy To Clean: It is super easy to clean even if grease or dough sticks to the surface, just with a cloth or place in the dishwasher.
- Heat resistant up to 500°F degrees (260℃). Safe in the oven or freezer. Each baking mat measures 9x13 inches (LxW), 9" x 13".
- Versatile: Perfect for baking, making pizza/macaron/pies/candy/pastry/cookie/bread/turkey. This high-quality baking mat is also perfect for various holiday gifts.
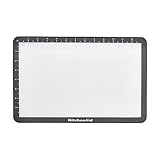
- IDEAL SIZE: 9x14 mat is designed to fit snugly in a KitchenAid baking sheet
- GREAT RESULTS: promotes even heat distribution for better baking
- ECO-FRIENDLY: use in place of parchment paper or foil
- DURABLE: nonstick and heat-resistant to 500F
- DISHWASHER SAFE: for easy cleanup